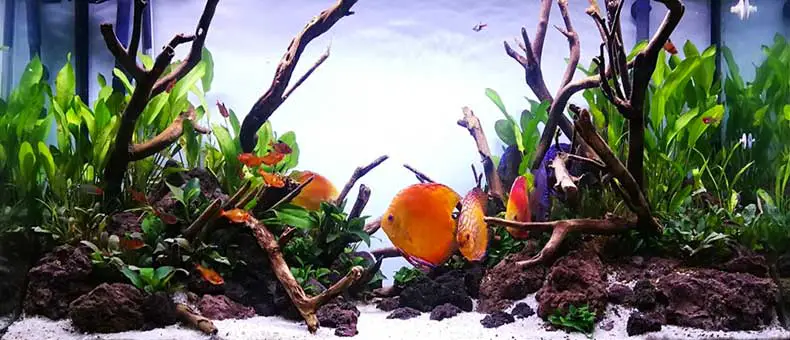
There are several factors to consider to building a Discus plant aquarium, factors as the tank placement, Discus tank filtration, heat supply, aquarium material, Discus fish tank decorations, type and style of the plant to use, etc.
I will be showing you how to go about your Discus tank setups and the materials you need in further steps but as a new Discus aquarist, I want to brief you on how to choose your perfect aquarium starting from the types of aquariums.
Things you need to consider before selecting and setting up your Discus aquarium:
- Types of Aquariums
- Discus Tank Requirments
- Discus Tank Minumum Size
Table of Contents
- Types Of Aquariums
- Discus Tank Requirements
- How To Set Up A Discus Aquarium?
- [STEP 1] – Tank Location Selection
- [STEP 2] – Consider The Size Of The Tank
- [STEP 3] – Selecting Your Aquarium Tank
- [STEP 4] – Selecting Your Filtration System
- [ STEP 5] – Selecting Proper Light For The Aquarium
- [STEP 6] – Selecting Your Substrate, Sand, And Gravels
- [STEP 7] – Selecting Your Plant
- [STEP 8] – Set Up Your Discus Aquarium Tank
- [STEP 9] – Adding Water To The Tank
- [STEP 10] – Place Your Aquarium Plants
- [STEP 11] – Add Other Decorations
- [STEP 12] – Set Up the Water Filter & Filter Tubes
- [STEP 13] – Place The Heater Into To The Tank
- [STEP 14] – Place The Aquarium’s Light
- [STEP 15] – Fix The Air Pump Tube Inside The New Discus Tank
- [STEP 16] – Testing Water Parameters And Temperature
- [STEP 17] – Adding Your Discus To The New Aquarium Tank Set-Up
- Conclusion
Types Of Aquariums
So, there are mainly two types of Discus tanks (in terms of use) to consider, the hobbyist tank, and the breeding tanks.
The Hobbyist Tank
This is the main tank in the aquarium it can also be referred to as a community tank. The hobbyist tank is the main habitant of the Discus, where the fishes are fed, properly taken care of, and grow, and this is what we are going to look for today.
The Breeding Tank
This is where tank breeding pairs of Discus are prepared for spawning.
Discus Tank Requirements
What Is The Minimum Tank Size For Discus Fish?
The minimum Discus tank size is a 50-gallon tank as the Discus fish thrives more in a school of 5 at least and 50 Gallons is the smallest size for them.
In order to succeed in your Discus fish tank setup, you should first identify all Discus aquarium components requirements which you gonna use:
- Discus Tank Mandatory Components
- Discus Tank Optional Components
Discus Tank Mandatory Components
- An aquarium heater
- A water filter
- An air pump
- Thermometer
- Water test kits
- Water changing kit
- Aquarium cleaning kit
- Lights and Hoods
[1] – An Aquarium Heater – This is compulsory in setting up an aquarium. It ensures that the aquarium water does not get too cool. It keeps the tank at a conducive temperature of (82º – 92º degrees Fahrenheit) which tends to keep your Discus from bacterial infections and disease.
There are two main types of heaters. The submersible heater is totally submerged in the water and the second has partially submerged glass tubes that contain heating coils.
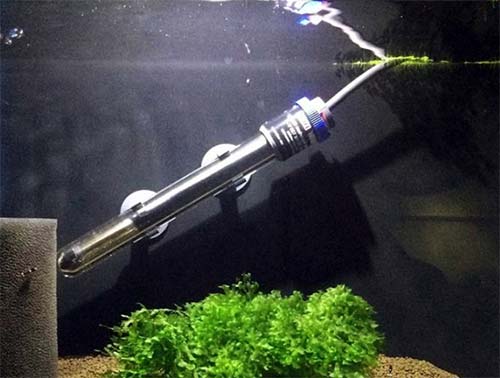
The submersible heaters are preferable and better because they are placed horizontally beneath the tank which keeps the tank in uniform heat and also prevents the heater from being exposed while performing partial water changes.
With the glass coil design heaters, the aquarium heater must be unplugged before doing water changes to protect it from any damage and any electric shock.

Heaters are divided not only in terms of type but also in terms of electrical power (Watts), the higher is its power consumption the more heat it provides, that is why the power value (measured in Watt) represents what size of an aquarium is sufficient to work for.
For your fist 50 Gallons aquarium, the heater watt is supposed to be around 200 watts, I highly recommend purchasing a good quality heater not only to work properly and guarantee a stable temperature for your Discus aquarium water, but also for your safety as well as your Discus fishes safety, if the heater glass gets cracked you will be exposed to electrical shocks and your fishes will die within a portion of a second.
I recommend you to buy the (AquaTop Titanium Heater with External Controller – 200W) it’s a good choice at a very good price, check it out from Amazon.
[2] – A Water Filter – You need a filter in your aquarium to remove excess food, dangerous chemicals, decaying organic matter, and the waste products of the Discus from the water.
If the fish’s excreta and other waste materials are not removed, they build up to high concentrated toxic materials and tend to poison your Discus or other fishes.
- The early stages of this are called ammonia stress – when it becomes more destructive, it becomes ammonia poisoning.
- When fish waste and decaying food material are left to float in the water it can cause cloudy aquarium water.
There are three types of filtration systems which are:
- The Biological.
- The Mechanical.
- The Chemical.
With mechanical filtration, your water is clearer, with biological filtration, your water is safer, and with the chemical filtration tank, your water is free from impurities.

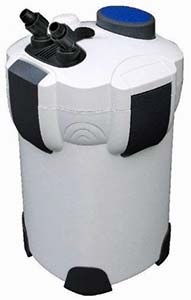
The best choice for a Discus fish aquarium is to have a water filter that does it all, which is in my opinion is the Canister filter.
The canister filter is powerful, maintains healthy water ingredients due to its biological and chemical filtration, and since Discus fish is a very sensitive fish unlike the other freshwater species, they need perfect water quality to survive healthily for many years to come.
Canister filters also have different mechanical/power types (flow speed rate) that are suitable for every aquarium size, so for your new Discus aquarium 50 gallons set up, the perfect choice to go for is (Penn-Plax Cascade Marlin Canister Filter for Fresh and Marine Aquariums) check its affordable price from Amazon.
[3] – An Air Pump – Air pumps bubbles air through your Discus tank. You need an air pump in your tank for these two important reasons:
First, they maintain an adequate concentration of oxygen in the tank. An air pump is not needed if adequate water movement together with surface distortion is maintained in your tank. This generally happens when filters like box and canister are used.
Second, you can force water through a filter like a sponge or a corner filter using an air pump.
There are different types of air pumps and what differentiates between them is not only the production companies but also how powerful they are to pump more air into the aquariums, so bigger aquariums require more powerful air pumps to provide sufficient oxygen required for healthy Discus.
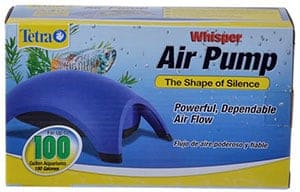
For a Discus aquarium tank of about 50 Gallons, I suggest a good quality air pump (a silent pump without annoying noises) that can massively provide your tank with oxygen which is (Tetra Whisper Air Pump 60 To 100 Gallons) you may check its affordable price from Amazon.
[4] – Thermometer – A thermometer is needed to keep the temperature of your tank in check.
There are three types of thermometers:
First, the traditional bulb thermometer works the same way as the regular home-used thermometer. You can hang them from the extreme top of your tank, or leave them floating along the surface.

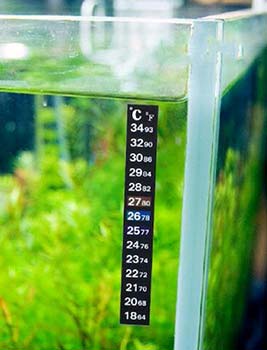
Second, a flat model that sticks externally to the glass. Chemicals that are sensitive to temperature are activated at a particular temperature which you should note on your thermometer.
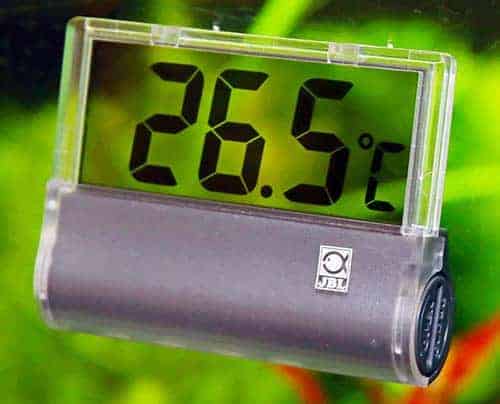
Last but not least, the digital thermometer, the digital thermometer has one side effect that requires a small battery to work, however, battery lifetime differs and when the battery reaches the last days of its lifetime it will not give an accurate reading.
I personally suggest you buy what I am using all the time is the classic thermometer for different reasons, first of all, it will work forever, secondly, it doesn’t require a power source to consume, the third thing is it is very trusted in terms of temperature results, you may check it out from Amazon it’s pretty cheap.
[5] – Water Test Kits – A test kit for keeping the pH of your aquarium water in check. It is necessary you have one, for measuring ammonia concentrations, nitrite and nitrate concentration, etc.
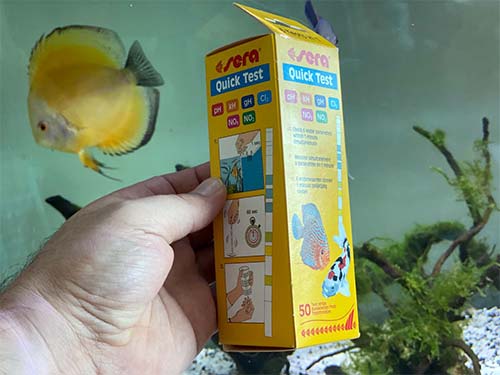
There are certain water parameters like (pH, Kh “water hardness”, gH, CI2, NO3, NO2, and ammonia) that you need to keep perfect all the time, and especially after every water change, most of those parameters can be found in 1 test kit in general and others like ammonia are on a separate dedicated tester.
[6] – Water Cleaning Kits – Regular water change to your aquarium is a key for a healthy long living Discus fish.
Water change can be accomplished in two ways:
- Using a bucket.
- Using python suction technology.
Using a bucket – Normally use a bucket in removing water from the tank, by using the largest bucket you can work comfortably with, it should be used specifically for the aquarium only, and don’t ever put chemicals in or on it. for sucking the water from the tank to the bucket a sucking manual siphon tool.
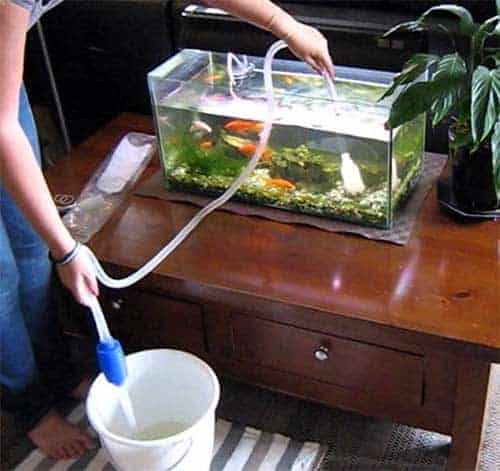
Using Python suction technology – One of the easiest ways to remove water from a tank is suctioning using water python for large tanks, you can also use a long hose which allows one to dispense with the bucket and suction water directly outside your garden or drainage system.
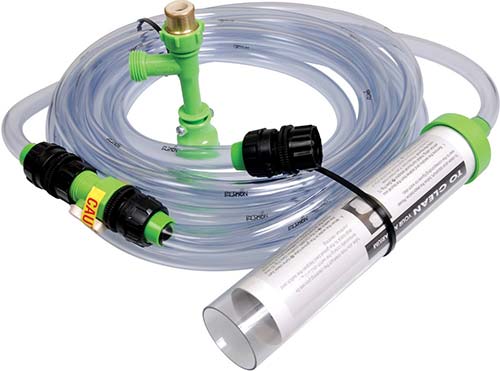
Python suction solution is a live saver and a game-changer for every aquarist, if you do not want to break your back every week going back and forth from your Discus aquarium to the washroom carrying heavily weighted buckets to complete the weekly water change, then Python suction solution is your way to go, this solution will help you to make a water change with 10 minutes without any water spills and without any efforts.
Python suction solution will also fill the tank for you once you are done removing the water amount from the tank by using it, so it’s a by direction water solution, Python suction solution also is your way to cleaning your aquarium sand and gravel every week while changing the water, so it is a 3 in 1 solution.
Check in the video on how easy Python makes your life
I strongly advise you to invest in the (Python Suction solution), you may check its affordable price on Amazon.

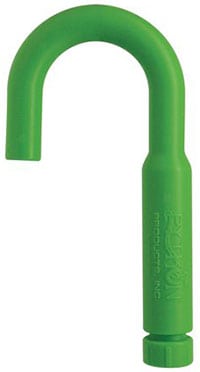
[7] – Aquarium Cleaning Kit – Your gravel should also be kept clean when performing water changes with the gravel cleaning attachments as well as the tank body.
There are certain tank cleaning kits that help you clean the gravel by sucking it (I mean the Python solution described above), as well as cleaning the tank sides kit and other needings.
The gravel cannot be sucked by the hose due to its weight, but churning up the gravel removes the dirt and food crumb which are light to be sucked.
for cleaning the tank sides, you need to use a plastic non-soapy scouring pad to remove algae from the side of the tank.
Having that said above, there is a cleaning kit that is very useful not only to clean the aquarium but also to do other needful actions, such as arranging the gravel, arranging the sand, cleaning thick algae on the walls of the tank, fixing the plants base on the substrates, as well as a net to manage your Discus fish and/or other fishes when transferring them to another tank for medications, or adding new fish into the tank..etc
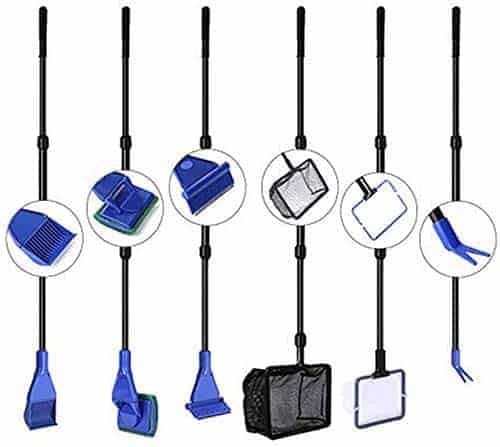
You will find such a handy All-in-one cleaning kit in every aquarist home.. it will assist you with a lot of stuff and without it, you will definitely suffer, you may consider investing in this kit I suggest checking it at Amazon for the best prices.
[8] – Lights And Hoods – Lights and hoods are very necessary to the Discus tank set up.
Reasons why aquarium hoods are necessary:
- A hood protects a fish from jumping out of the aquarium.
- A good hood effectively seals the tank exempting the compartment where the heater and filter are placed.
- A good hood should properly seal the tank.
- The hood also stops water from evaporating from the tank and you do not want so much water escaping from your tank.
Aquarium light is essential for two reasons:
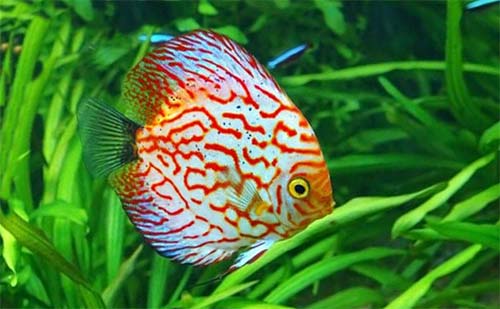
- It highlights and shows off your Discus colors.
- Provides energy for plants in the aquarium.
Because of the plants in your tank, more light is needed the help the plants look healthy.
Several bulbs emit light at different spectral regions. Full-spectrum bulbs try to emit light at almost the same spectrum as the sun and they are the best for both growing plants and showcasing the natural colors of your Discus.
There are bulbs that are made especially for plants e.g., gro-lux. They demonstrate a spectral range that enhances plant growth.
Last but not least, aquarium light normally comes with the aquarium if it was branded, otherwise you require to buy separate options of lights for your handmade aquarium.
So, if your aquarium has no light with it, I recommend looking for a long-lasting lifetime led light that has different light color options and is suitable in terms of length to work perfectly with your new 50 Gallons Discus aquarium which is the (Koval Inc. 156 LED Aquarium Lighting) it is also being sold at Amazon at competitive prices, so check it out.
Discus Tank Optional Components
Of course, when you use only the mandatory aquarium components, your Discus fishes would survive. However, some hobbyist considers the below optional components as mandatory since adding them will make the aquarium’s environment close to the wild’s, which logically should make your Discus fish happier and healthier.
- Substrate
- Driftwood
- Plants
- Co2
- Decorations
[1] – Substrate – There are different types of substrate that you can use in your Discus aquarium tank:
Gravel – Gravel can make a perfect substrate when used properly.
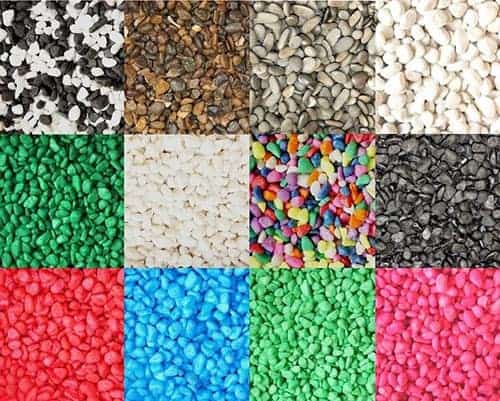
In setting up your aquarium with gravel you have to fertilize your gravel intensely for your aquarium plants and you must also ensure that the sizes of your gravel are small enough to give the plants a root base.
For the Discus fish tank normally we select white gravels so Discus fishes will not have the black peppering on their bodies in case they are a pigeon blood Discus, so I suggest you check the (Aqua Culture Aquarium Gravel, White, 5-Pound “2 -Pack”) on Amazon, remember that you need to order 2 of those to cover the whole 55 gallons tank as you need at least 40lbs (19 Kg) of gravel to cover the whole tank base.
Sand – This substrate is recommended for your Discus aquarium tanks because it is very attractive, but it must also be used with caution.
If you have a taste of having sand in your aquarium to have that elegant look, I suggest you go for the (Caribbean Aquarium Live Sand 20 Lb) you need only 2 bags of this sand since it is 20 lb weighted so 2 bags are sufficient to cover the entire 55 gallons tank of yours, you may check its affordable price at Amazon.
These precautions of using large grains should be taken because of the following reasons:
- When it compacts, it is difficult for roots to grow into it, and water circulation is reduced.
- Small holes for anaerobic bacteria can develop and if this happens, poisonous gas bubbles are created.
Eco-Complete
This substrate is very suitable for your Discus aquarium.
Eco complete substrate already has beneficial bacteria, nutrients, and minerals for live plants, therefore it rising is not required. It is deep, black, and sandy gravel and it has perfect grain sizes which encourages root growth and your bottom fish is safe because the gravel is rounded.
However, if you like how this substrate looks, then you can go for the (Eco-Complete Planted Black Aquarium Substrate – 20 lbs) check it out at Amazon.
ADA Aqua Soil
This substrate is based on a variety of biotopes from around the world, including Amazonia, Malaya, and Africana.

Each one has different colors and properties and its grains are perfectly rounded allowing proper circulation of water.
Benefits of ADA Aqua Soil:
- It prevents roots from choking and prevents ground fishes from getting hurt.
- It can also serve as a passive filter because it doesn’t permit the float of the flow of particles.
Using soil for your plant aquarium is a must, your plants will not survive without (Soil, Co2, and lights) so aquarium soil is one factor that you should buy with the aquarium since your aquarium has plants, I own a planned Discus aquarium and I am using aqua soil underneath the gravels where the plants are planted, I suggest a good buy for you to go with this soil from Amazon.
Can I Use Two Different Substrates For My Aquarium Tank?
Yes, you can, take an instance, using sand and gravel, but please DO NOT mix two substrates together, you can only mix two substrates together when they are of the same grain.
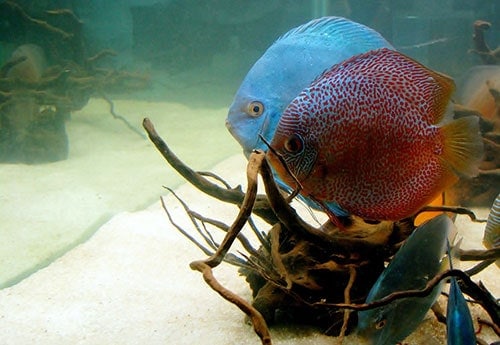
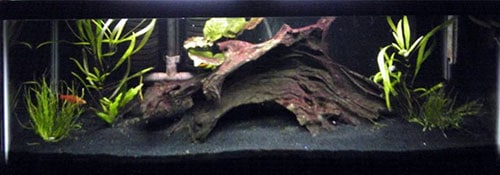
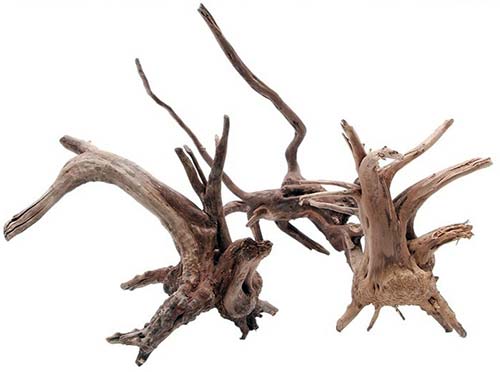
[2] – Driftwood – The driftwood looks good and it also maintains and stimulates the ecosystem around an aquarium.
Driftwood benefits in a Discus aquarium setup:
- The driftwood enhances the growth of essential bacteria that breaks down fish excreta into less toxic materials, safeguarding the health of your fish.
- The driftwood ensures through the added surface area that you will always have a healthy colony of these beneficial bacteria.
- Driftwood also helps in boosting the immune systems of your Discus fishes.
- Submerging driftwood leaches natural tannins slowly into your aquarium water. These tannins help to keep diseases and viruses away from your tank by creating a slightly acidic environment.
- Tannins, when it is released, can also increase oxygen in the water column, which stimulates the immune system of the fishes.
- The addition of driftwood enhances the natural behavior of your fish since adding driftwood to your tank helps buffer and maintain a lower pH in your aquarium.
- Your fish will use it for hiding, breeding, and including for food.
You can find driftwood like the ones I have in virtually every river or lake, or you can order them directly online, check those driftwood collections from Amazon and order the ones that you like.
[3] – Plants – The most important benefit of having live plants in your aquarium is to produce oxygen (O2) and absorb the carbon dioxide (CO2) and ammonia (NH3) that the fishes generate.
Benefits of having live plants in your aquarium setup:
- Live plants help recreate a natural ecosystem which is one of the most beneficial ways to maintain your Discus fish’s health.
- Plant in your aquarium gives shelter and security to the fishes in your aquarium.
- Live plants compete with algae for nutrients, they help in reducing the growth of algae.
[4] – CO2 – CO2 is very essential in a planted aquarium, arguably it is the most important element in the planted aquarium.

It is required by the aquatic plant for respiration and growth by the process called photosynthesis, the CO2 cylinders are not going to pump the CO2 into the aquarium water one time but it will take weeks of pumping small bubbles of the CO2 via a regulator and Automator.
I have a perfect suggestion for you same as the one I am using, a (2L CO2 Cylinder+Automizer+Pressure gauge+Bubble diffuser) all in one product with an affordable price, it is the (2L Double Aquarium CO2 Generator System Kit) so consider checking its price from Amazon.
[5] – Decorations – Decorate your fish tank with decorations that you are delighted in as long as they are not harmful to the fish.
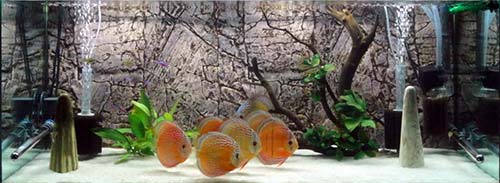
A Discus aquarium decorations mostly are used for fine-tuning the feel and look of your aquarium, so decorations like rocks on the sand, cement/wooden backgrounds, pottery objects… etc are all used based on the aquarist demands to build the environmental look and feel of his Discus aquarium.
In most cases, the fish don’t care if you use a fluorescent-colored castle or a rock with some holes in it – or live plants instead of pearl-colored plastic, however, it is important to know a little about your fish, Discus prefers plants and/or other decoration objects includes other fine or frilly, generally flexible things.
How To Set Up A Discus Aquarium?
Follow the below steps in order to build your new Discus fish aquarium setup:

[STEP 1] – Tank Location Selection
You need to find the perfect location based on some factors the right place for your fish tank depends on these factors:
- Size of the aquarium.
- The shape of the aquarium.
- The layout of your home.
So, the right place for your fish tank might not be the best place for my fish tank. But we cannot still leave choosing a tank location to chance.
The steps below will guide you in making a decision on where to put your Discus aquarium:
- Where it can be seen – You do not want to put your tank in a hidden part of your home, it should be located where it can be seen and where the view can be enjoyed.
- Closeness to light and water supply – You should choose a location that is close to electricity and water because equipment like heater and filter requires power to work.
- Is it spacious? – You might want to consider where to place other equipment needed for the aquarium such as your heater, large bucket for performing water changes, etc.
- Consider the temperature – Is it stable enough? your tank should not be close to an open window or close to a heater. An unstable temperature can cause a lot of stress for your fish.
- Is there any source of direct sunlight? – You must consider avoiding a place where is any source of direct sunlight, direct sunlight will develop an excessive amount of algae in your Discus tank.
- Can the place carry the weight? – You need to consider the weight of the tank in your location, the larger the tank the more weight it will carry.
[STEP 2] – Consider The Size Of The Tank
The size of the tank determines how many Discus fish will go in with a minimum of 5 Discus for a 50-gallon tank.
Take into consideration that the bigger the aquarium tank means the more maintenance and water amount changes, nevertheless, the bigger the tank the happier Discus fishes are and the more beautiful the tank look.
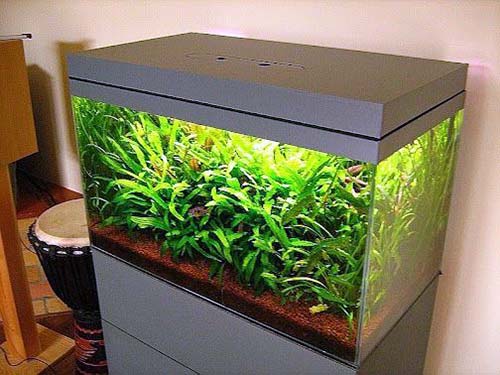
[STEP 3] – Selecting Your Aquarium Tank
There are different types of aquarium tanks in their different shapes, e.g. rectangle, square, circle aquariums. You can get custom acrylic rectangle tanks; they are completely safe for your fish.
The shape of your tank depends on the theme and/or the location of the desired tank placement, or depends on your taste as the aquarist and how you are visioning its look and design after completing setting it up and running.
[STEP 4] – Selecting Your Filtration System
For this step, selecting your filtration system depends on different factors such as:
- Your Tank Type
- Your Tank Size
Your Tank Type – This is important because if you are about to buy a branded aquarium tank, then normally the filtration system comes with it, but this is also not limited to you to select a different and better filtration system for your tank even if it branded.
Your Tank Size – Tank size is a major factor in selecting your filtration system because the bigger that tank is the more powerful and bigger filters are required, especially when the tank is bigger means more Discs fish and more waste ammonia to be cleaned.
There are alternative filters that can be used for your Discus aquariums but of course, they are not going to provide the perfect water parameters like the external one mentioned above, since those types of filters are very good for other types of freshwater fishes that are less sensitive than the Discus.
There Are Different Alternative Types Of Filters To Choose From
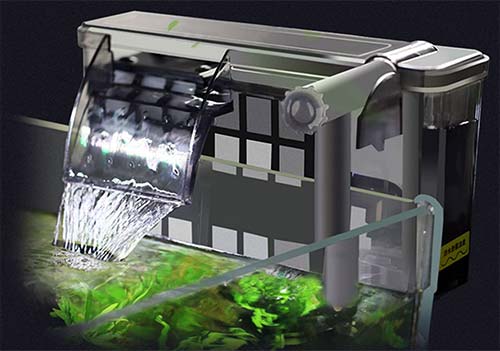
Hang On Back Filter – A hang-on-back filter is placed on the top rim of an aquarium with the filter box hanging outside the tank and the intake tube put down into the tank.
Water is suctioned and the intake tub through the motor of the filter passed through each of the media in the filter box, and then returned back into the aquarium like a mini waterfall.
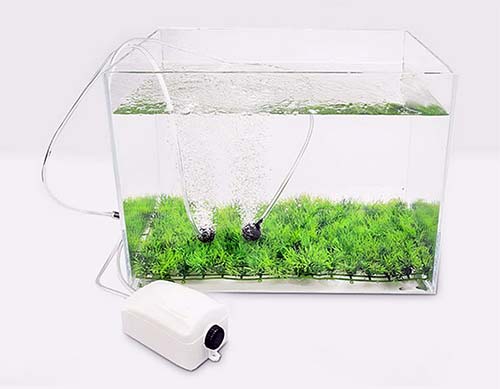
Sponge Filter – Amongst all the filters this the most basic.
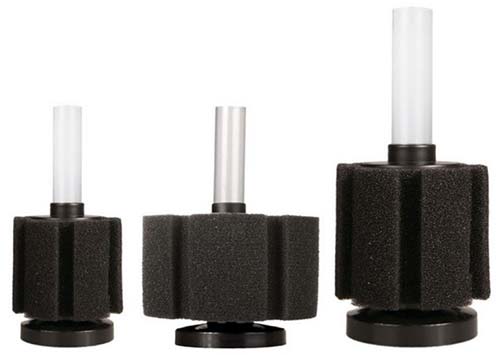
It has three components:
- A sponge filter sitting inside the tank.
- An air pump that sits outside the tank.
- Airline tubing is used to connect them.

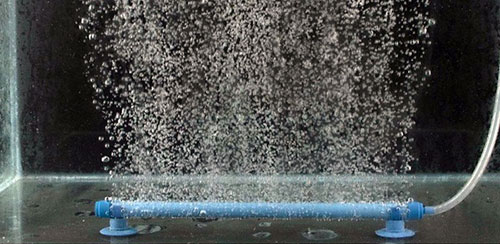
There’s a hollow cavity inside the sponge filter in which the air pump pushes air through the tubing. The bubbles rising from the air draw water through the sponge walls, therefore taking debris from the water mechanically and giving healthy bacteria room to grow in the tank. This filtration system is reliable and also cost-effective.
There are other systems of filtration like:
- Fluidized filter – This is also useful for most small aquariums but for bigger aquariums for Discus it’s not sufficient.
- Internal filter – This filter comes in most branded aquarium tanks that use only a sponge inside of it and can be used for both air pumping and filtration, but as I said it is not perfect for Discus fish keeping.
- Sumps filter – This is one of the most powerful filtration systems but is normally used with big farms and aquariums that require sufficient space to put it and use it.
[ STEP 5] – Selecting Proper Light For The Aquarium
The best light for Discus fish is Bluetooth aquarium lights. Moving on to set up this perfect lighting for your Discus fish, my calculation of just the right amount of light for Discus fish is about 1 to 1.5 watts of light per gallon. The light should be set on a timer for a maximum of 6-8 hours a day.
Alongside these, make sure the tank is sufficient and the light spreads all around it.
[STEP 6] – Selecting Your Substrate, Sand, And Gravels
Depending on what design you are looking to make, this will decide what you will put into the base of your aquarium if it is planted aquarium so you have to go with the soil first, you could also go with gravel or sand with soil but you should put the soil underneath the gravels/sand.
[STEP 7] – Selecting Your Plant
For the Discus plant, I will advise that you plant strong and firm plants like Anubias Nana, Java Fern, Jungle Vallisneria, Brazilian Pennywort, Amazon Sword, etc. with smaller ones in front and larger ones behind. So, the fishes would have space to swim.

To see the full list of my Discus aquarium plants recommendation you may check out the (13 Best Discus Aquarium Plants – Discus Aquascape Plants List).
[STEP 8] – Set Up Your Discus Aquarium Tank
Follow the below steps in order, how to set up your Discus aquarium:
[1] – Place your tank – (At least a 50-gallon tank with the shape of your choice) in the location you have chosen, ensure it is properly clean.
[2] – Position your substrate in the tank.
Steps and Tips to set up the substrate:
[1] – Add the soil to cover the desired area of your design.
Your substrate needs to be sufficiently deep for the roots of your plants, but not excessively deep. 2-3 inches is just perfect, and when substrates are made too shallow, the roots will not be able to deeply root the plants in the aquarium, when it is deeper than normal there is really no use.
The description below works perfectly for rectangular tanks:
- If you want a 1-inch deep base – For every 1 gallon of water use 1 pound of the substrate.
- If you want a 2-inch-deep base – For every 1 gallon of water use 2 pounds of substrate.
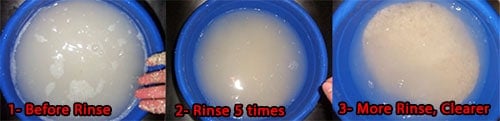
[2] – Add the selected gravels/sands on top of the soil layer, spread it with your hand with the desired geometrical layout look and feel.
- Put the sand in a big bucket.
- Fill the rest of the bucket with water.
- Move your hands within the sands to move all small particles.
- Rinse it by pouring out the water with the small particles and fill it with water again.
- Repeat this process until you see the water becomes clean and no sand particles are going out of the sand anymore.
By rinsing your sand you will prevent your tank from being foggy for several days after adding the water.
[STEP 9] – Adding Water To The Tank
Sufficient enough to fill the tank, but not up to the brim.
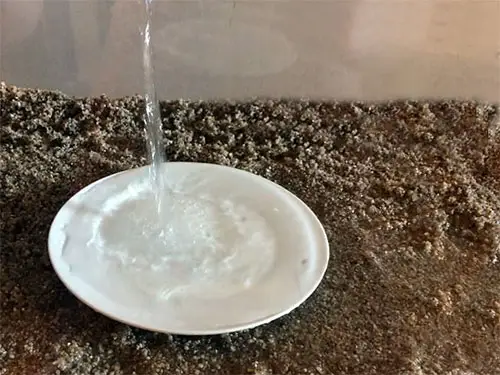
Place a saucer inside the tank while pouring water to fill the tank to prevent water and substrate splashing on your tank and filling with water.
[STEP 10] – Place Your Aquarium Plants
This step of setting up your Discus aquarium is where your creativity takes a place, remove the protection base of a specific plant’s roots (from where you bought it), then, using a special type of plant long tongs, catch the stem of the plant above its root and insert it firmly and gently into the sand penetrating the soil in decent depth.

[STEP 11] – Add Other Decorations
In decorating your fish tank, there are several decorations you might consider normally aquarists add into their tanks depending on the design they are making, for example with an aquarium of little plants they use to put big driftwood with big pebbles or rocks.. some of them also uses a specially designed background either printed or graved.. in the end, it’s your taste and creativity.
[STEP 12] – Set Up the Water Filter & Filter Tubes
This step is so important if you have a branded ready-made aquarium tank, this will be easier since the tank has its own hood with specific holes in it, so the external filter (Canister filter type) will be easily installed into it.
If you have a custom-made tank, then better to have an alternative filtration solution as discussed above for example the hang-out filter type which will provide the same water quality as the canister filter type.
[STEP 13] – Place The Heater Into To The Tank
Place the heater that you purchased close to the source of water circulations so in this case, the heat will distribute quickly to the whole tank.
[STEP 14] – Place The Aquarium’s Light
There are many types of aquarium lights to purchase depending on your aquarium size, so at this step, you are finalizing the Discus aquarium tank set up, simply place the light on top of your aquarium and connect it to the power source.
The lights generally come in at least two colors of light, one is white and the other either pink or blue, the reason behind that is you cannot put on the normal light (white color) all the time cause this will develop algae in the tank which is not healthy to the Discus as well as it takes time and effort to remove, so the other light color gives you the opportunity to turn on the light at any time that is out of your regular hours time of the normal light.

[STEP 15] – Fix The Air Pump Tube Inside The New Discus Tank
In order to maintain a healthy Discus fish in your new tank set up, it is mandatory to have a good oxygen source into the water and this became crucial since you have a big tank of at least 50 Gallons and that means you need a lot of oxygen to pump into the water.
A water filter is not a good source of oxygen hence you require to add an additional air source using an air stone with an external air pump as described at the beginning of this article, or you could use the output tube of the external water filter (canister powerful filtration system) that pour back the water into the tank, connect this tube to a waterfall extension (tube with holes and place it over the water) that circulates the oxygen into the water.
[STEP 16] – Testing Water Parameters And Temperature
[1] – Use the water test kit that you already purchased to check the water before adding the Discus fishes to the aquarium tank, this will ensure a healthy environment for them, check the pH, kH (the water hardness), GH, CI2, No3, N02, and ammonia.
[2] – Install the thermometer (the type that you have purchased) and check the water temperature, it should be as we agreed around 82º to 86º F (28º – 30º C), and keep your eyes on it every time.
[STEP 17] – Adding Your Discus To The New Aquarium Tank Set-Up
This is where the fun part starts, before adding your Discus fishes to the tank, follow the below steps:
- Open the plastic bags you brought with you or you got them delivered.
- Put one Discus bag at a time (with the Discus fish inside) in the tank floating at the top of the water.
- Hold the bag from its opening, insert it into the water surface and fill the same amount of the bag’s water with your aquarium water.
- Leave the bag floating on the aquarium water while opened from the top.
- Add a general Aid medication to the bag.
- Leave the bag there for about 15 to 20 minutes.
- Take the bag off the aquarium water, and use a fish net to grab out the Discus and drop it into the aquarium.
Note I have asked you to grab the fish using a net so the water in the bag you should through it away and not added it to the tank.
Consider Regular Discus Tank Maintenance
- Weekly water changes
- Cleaning the tank gravel or sand from Discus wastes during the water changes process.
- A constant check of the pH of the tank, and Temperature check also.
Conclusion
Setting up a new Discus-planted fish tank you must take all necessary precautions because the Discus fishes are far more sensitive than you think. If you are using a tank that has been used ensure that it is properly washed (by water ONLY), and dried so that you do not start having mortality before you begin.

Excellent writing. Easy to follow.
We have a 90 gallon aquarium with a large sump.44lbs of aquasolum and 40lbs of Carin sea eco planted substrate with various plants. Our ph is at 6 and we would like it a little higher. I know that discus could stay in a ph of 6 but it would be a hassle with water changes. We would like the ph to be closer to 7, we did a 50% water change adding in water that had high ph and kh and in 2 days the kh was 0 and the ph back at 6.
What can we add to stop the kh and ph from going down? At the moment we have no fish and the tank is cycled.
this is a good question, there are a couple of ways to control ph in aquarium water, but in your case, I believe you need to make good aeration in the water, add some air stones to cycle more oxygen in the water this will help to oxygenate your water.
I will write a whole article about ph issues and how to maintain healthy ph levels for your Discus fish.
Quick question- will old old dry driftwood release any tannins to benefit the tank, or will it be merely decorative?